Boba Fett

Process Journal – The Book of Boba Fett

Process

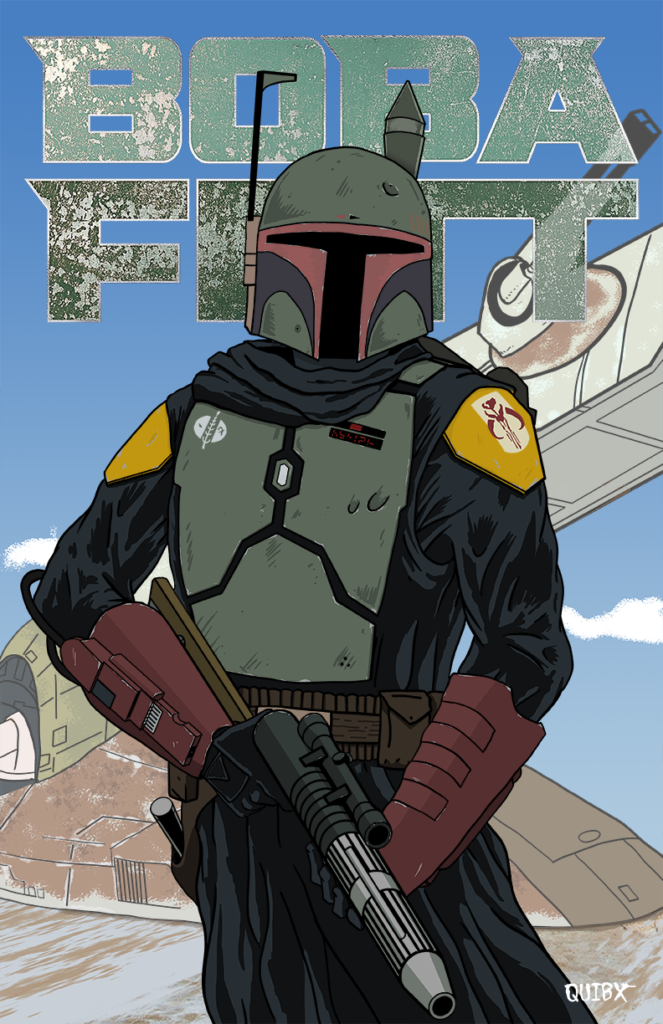
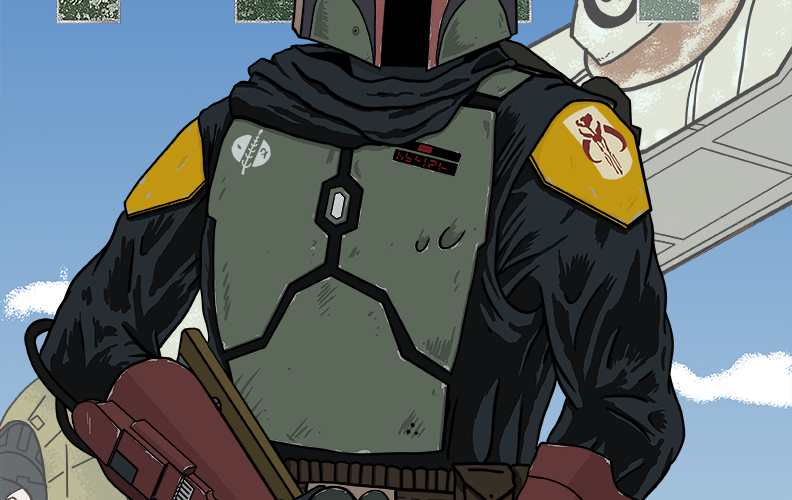
Like many of you, I was super happy to see Boba Fett again, and I loved his new look. Therefore, I decided to do some fanart!

This one was all digital, because I need the practice. I used an old Wacom tablet (the one without the screen) and Photoshop.

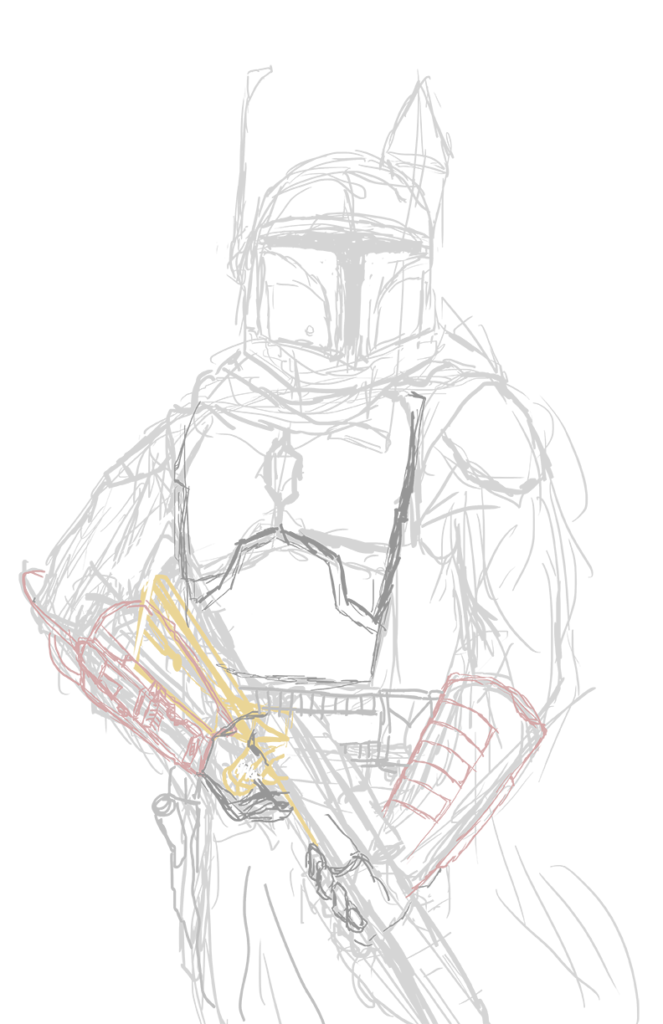
First, I sketched out a general idea of what the piece would look like

Boba Fett Sketch

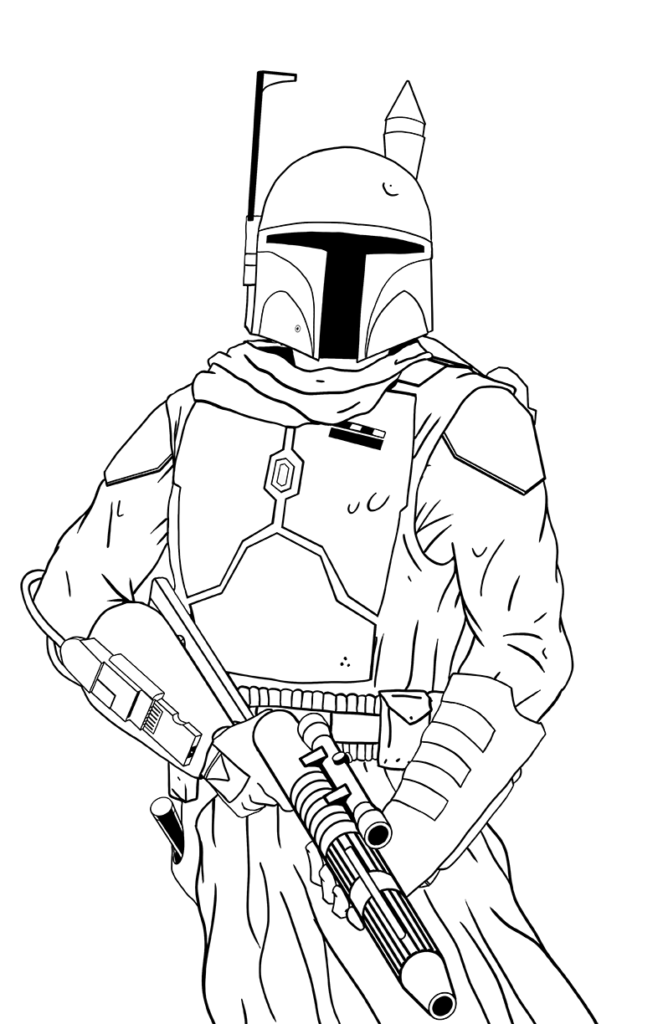
Next, on a new layer, I did the lineart

Boba Fett Lineart

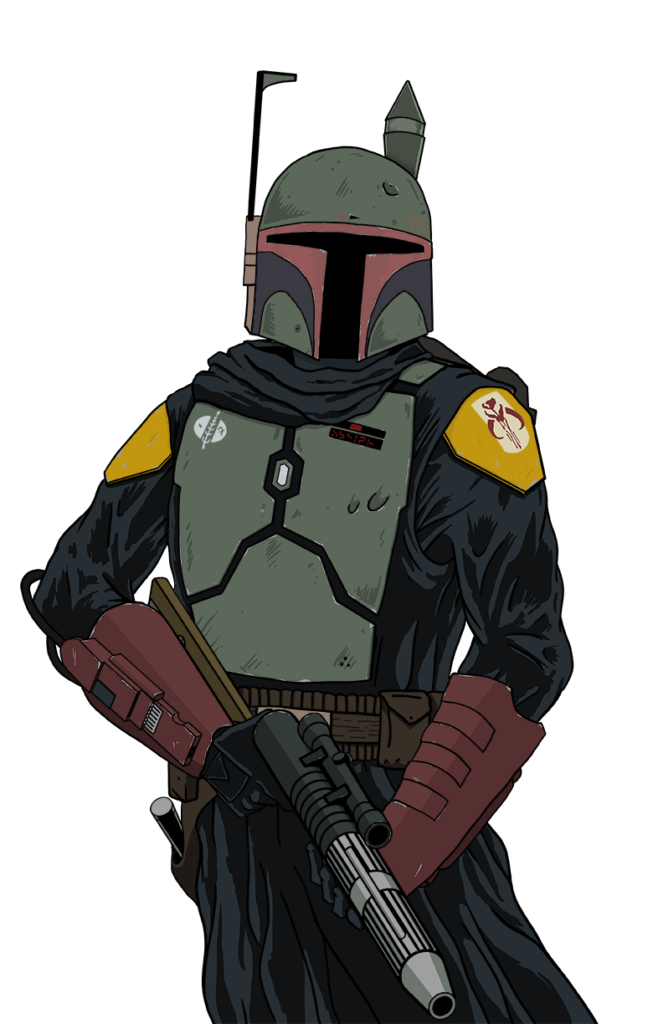
Next, I blocked all the colors, and then kept all the distinct items on separate layers

Boba Fett Color

Next up is the background, and I HATE doing backgrounds. I took a photo of one of my Slave 1 toys and used it as a reference

From there I used it as a guide to trace over, added it in back, and it still looked poor. I tried to cover it up with a Boba Fett logo from the Book of Boba Fett series. I think it came out OK.

Boba Fett


Process Journal – Dokuro Mario

Process

I had applied to take part in the Ralph Baer Day exhibition early in the year, but never heard back. Two days before the show was set to begin I got an email notifying me of art drop off times! So I had to quickly scramble to get a piece done. I’ll admit that it’s not my most creative or interesting work, but I had to go with something familiar in order to get the painting done in a day.

Step 1: Compose references in Photoshop

Step 2: Using the source image as a guide on a locked layer, sketch out the basic form with a tablet.

Step 3: Using that basic sketch as a guide, do linework on a new layer.

Step 4: block out colors using linework as a guide. Again, on a separate layer.

Step 5: Display the finished layers while hiding the work layers.

Step 6: Now, because this is for a gallery, I wanted to make an actual painting on a canvas. I printed the image out in actual size. Because the canvas is larger than my printer, I had to tile the image and tape it together afterward.

Step 7: transfer the line art to the prepared canvas with carbon paper. Then block out basic colors in acrylic.

Step 8: Whisky

Step 9: start the line art with black acrylic.

Step 10: Last touches include the detail on the bricks and clouds!

Step 11: Drop it off at the gallery once the paint dries!